A Session for a Young Model – A North Light Session
By Gary Bernstein
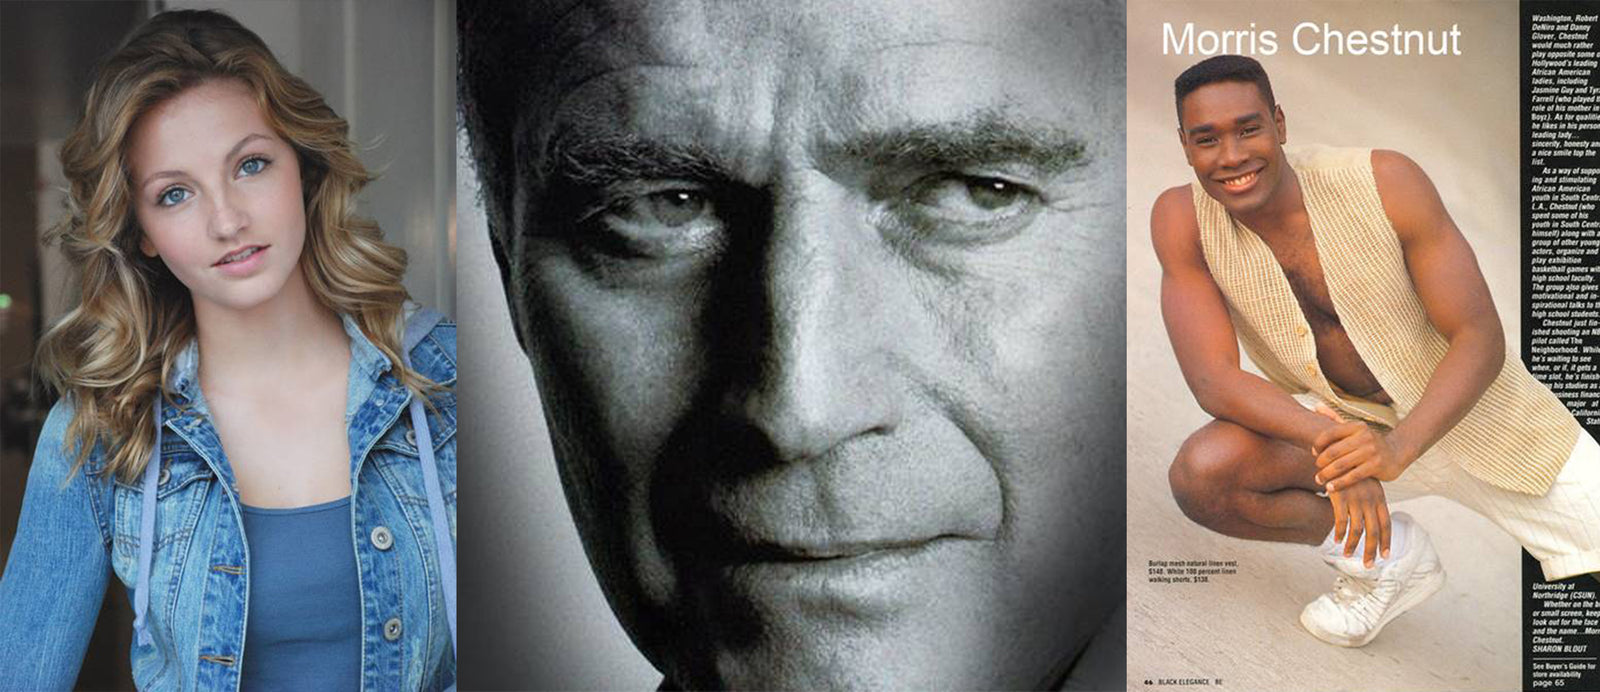
Let’s open with an image I made of legendary actor Charlton Heston. It was made with one light – very similar to the lighting I used on the model (the last shot in the article) in my last column for Denny. Notice that I often use a small silver reflector to fill the shadows just slightly (so they don’t go jet black without any detail), and secondarily, the reflector (depending on the angle) adds additional catch lights to the subject’s eyes to give the photograph more life. Subtleties are the key.

Now, let’s talk about the photography of a young hopeful model using north light to start with.
Shot 4-7 (below)
Light Source: North light from open garage door
Location: Studio
Camera: 4 and 6 MB Digital Cameras with Zooms (standard to short telephoto)

Photograph © Gary Bernstein . All Rights Reserved
Shot 4-7
This pretty young model from Denver came into LA with her parents for a portfolio photography session. Notice the difference in approach in terms of posing, lighting and attitude between this session, and the images from my last article of the sophisticated (and more mature) actress.
If model shots are to be successful, we need to first define “successful.” It means not only that the client likes the look and results, but that the images result in giving the model the best opportunity to secure representation with a good agency.
I can tell you that very often the model (and or the model’s parents) don’t really know what is needed photographically from an agent’s perspective; and there is really no reason for them to know as it is not their industry; but you need to know, so that you can provide photos that give the model the best chance possible for a career. At the very least (if she doesn’t have the look that is needed professionally (which, of course, changes—just as fashions change)), you (and she) at least end up with beautiful pictures that capture a vision of the model’s best attributes.
The exact same lighting was used for this magazine editorial I shot with actor Morris Chestnut (below), in which the overhang of a garage bends soft light into his face.

Variation 2 – A Session for a Young Model
Shot 4-8
Light Source: North light from open garage door
with 1 silver reflector
Location: Studio
Camera: 4 and 6 MB Digital Cameras with Zooms (standard to short telephoto)

Photograph © Gary Bernstein . All Rights Reserved
Shot 4-8
Light for Shot 4-7 is about as basic as it gets: morning daylight (eastern open sky) striking the model who is standing inside an open garage door. The result: beautiful, soft direction light. The overhang bends the light into her eyes at the ideal angle of 30-45 degrees above the height of her eyes.
Her expression is perfect—open, innocent, young, fresh. Not sultry or coming on to the camera. “Well, can’t you shoot sultry shots of a young model? What’s wrong with that?” It’s not wrong. Nothing is ever wrong (more or less 😉). The purpose of this session, however, is to secure images that will work for the majority of agents a majority of the time. So let contemporary catalogs and advertisements always be your guide. Make your shots look better than those in the published books. This particular look has not changed from day one in this business, and it never will—and regardless of whether you are shooting in LA, New York or Milano—the needs are not that dissimilar, I assure you.
Shot 4-8 is a variation on the same theme, with the following slight changes: We pulled up the hoodie in terms of styling. I stood up a piece of silver fabric behind the model for a slight change in background.* In addition to the daylight coming into the model’s face from the open garage door, I stood a small silver (yet very efficient) reflector on a light stand behind me. It picked up just a bit of diffused sunlight that I bounced into the model’s face. It is the openness and naturalness of this shot and the one preceding it, which makes it so commercial (and yet editorial).
*you should have at your disposal a wide variety of fabrics and “surfaces” that can be changed instantly. Why? Because one of the toughest parts of photography is to get good lighting on the subject, meaning that once you have taken the time to create great lighting, why limit it to just one look(?) Use that same lighting, and change the background; change the wardrobe and keep rolling film (or pixels). There is no better source for those backgrounds than Denny Mfg. – so pick your favorite 6 and keep them handy on portable stands.
Variation 3 – A Session for a Young Model . Mixing Daylight and Hot Lights
Shot 4-9
Light Source: North light in a doorway
with 1 silver reflector
Location: Studio
Camera: 4 and 6 MB Digital Cameras with Zooms (standard to short telephoto)

Photograph © Gary Bernstein . All Rights Reserved
Shot 4-9
Shot 4-10
Light Source: North light in a doorway
with 1 silver reflector and flash on camera
Location: Studio
Camera: 4 and 6 MB Digital Cameras with Zooms (standard to short telephoto)

Photograph © Gary Bernstein . All Rights Reserved
Shot 4-10
We changed outfits—and on Shot 4-9, the exact same setup was used as on the previous two photographs. Nothing is nicer than a pair of door frames for a model to use for security and as a prop. Just watch your cropping.
For Shot 4-10, I opened up the camera’s on-camera flash. In this case, I used it along with the reflector, and the result is a beautiful, fresh headshot. Yes, the lighting is definitely flat—and that’s what we’re looking for here—very soft—young—flat lighting. Most of the time, the on-camera flash is too low for good facial “modeling.” In this case, it works for two reasons: 1) the reflector was kicking in more power from above, and 2) my model is a very young girl—and the younger the model—the more forgiving the lighting angle! In terms of this progression, remember, if it looks good as a full-length, it will look good as a half length; and that half-length will look great as a headshot.
A brief comment on composition: Do you want pure drama—and the greatest impact in your images? Always keep the subject’s eyes in the upper third of the frame. Take a look at the majority of the images I shoot—from tight heads to full length as examples. “So…you mean I can’t ever break that rule??” Of course, you can…if it makes for a stronger shot; but it is said that the Greeks came up with the rule of thirds (or dynamic symmetry) many centuries ago, so judge for yourself!
So how do you get those open expressions from somebody you just met 30 minutes ago, and who is a little scared and insecure about the whole process? It starts with your confidence, based on knowing what you’re doing—on knowing that one way or the other—you will come away with the shots, and letting your subject know that the full burden is on your shoulders alone. Tell your subject that you will be shooting a lot of images—that your time is hers (or his, or theirs ;))—that “we will have so many wonderful shots, you won’t even be able to pick.” Sound trite? It’s not. It’s the truth. I know it’s the truth. This approach works with beginning models—and it works for the most-celebrated individuals in the world; and as stated, we are all insecure before we see the results (and with digital, you can—of course—show them a variety of shots as you work—continuing to build confidence in the subject).
Always talk to your subjects as you’re shooting. Once the lighting is set, work with the subject as though you were directing a scene from a movie. The built-in motors on cameras and digital capture make this easy.
More to come in this session…
Happy Shooting!

Gary Bernstein









Leave a comment (all fields required)